

Blog
How to Do Gel Nails at Home with a UV LED Lamp (Beginner Guide)
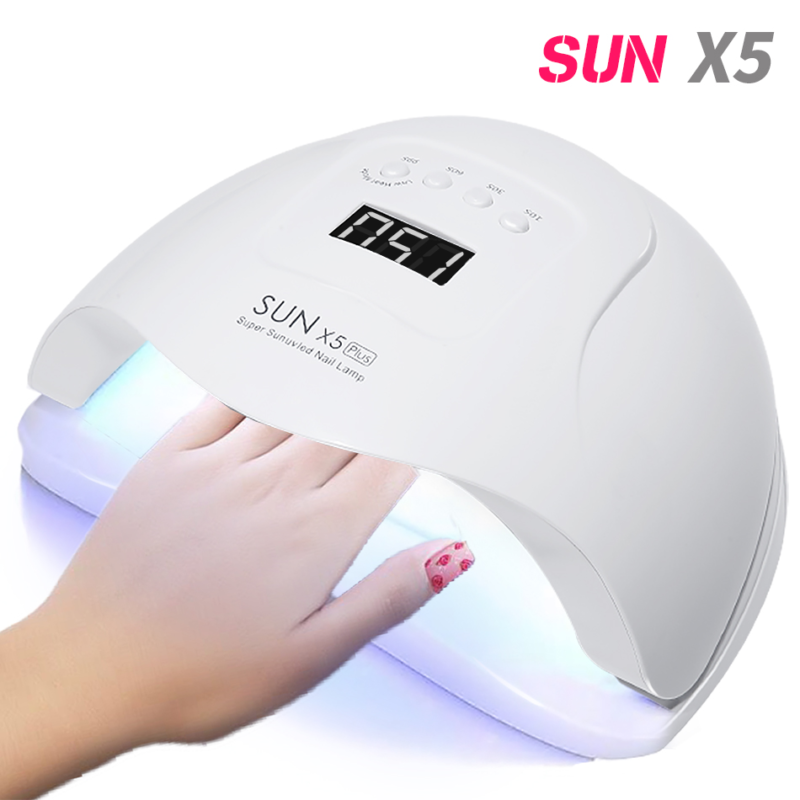
Quick answer: To do gel nails at home you need a UV/LED nail lamp, a base coat, gel color and a top coat. Prep and dehydrate the nail, then apply thin layers and cure each one under the lamp (usually 30–60 seconds on an LED lamp, but always follow your gel brand’s instructions). A home lamp like the SUN 5X Plus UV LED Lamp ($25.95) pays for itself after one or two skipped salon visits.
What you need
| Item | Why |
|---|---|
| UV/LED nail lamp | Gel polish only hardens under UV/LED light. Without a lamp it stays sticky. |
| Base coat, gel color, top coat | Base helps adhesion, top coat gives shine and protection. |
| Nail file and buffer | Shapes the nail and removes surface shine so the gel grips. |
| Cuticle pusher | Gel on the cuticle lifts and peels early. |
| Rubbing alcohol + lint-free wipes | Removes oils before you start and the sticky layer at the end (if your top coat has one). |
| Optional: Nail Armor Gel | A keratin gel coat for weak natural nails. |
Choosing a nail lamp
Most modern gels cure under LED lamps that emit in the UV-A range. What matters for home use is power, timer modes and whether both hands (or a foot) fit.
- SUN 5X Plus ($25.95): 36 LED beads, LCD timer with 10/30/60/99-second modes, 100–240V, about 600 g. Available as 36W USB or 54W with US or EU plug, in pink or white. A good first lamp.
- SUN 5 Pro 72W ($55.95): more power and a larger chamber that fits both hands or a foot. Works with hard gels, builder gels and popular soak-off gels. Better if you do nails often or for friends and family.
Step-by-step: gel manicure at home
- Prep. Remove old polish, push back cuticles, shape with a file and lightly buff the surface.
- Clean. Wipe each nail with rubbing alcohol. Don’t touch your nails after this step.
- Base coat. Apply a very thin layer, keeping it off the skin. Cure (usually 30–60 s on LED).
- Color, first coat. Thin layer, “cap” the free edge by brushing along the tip. Cure.
- Color, second coat. Another thin layer for full color. Cure.
- Top coat. Seal the color and cap the edge again. Cure for the full time.
- Finish. If the top coat leaves a sticky layer, wipe it off with alcohol. Apply cuticle oil.
Tip: Thin coats are the most important rule. Thick gel cures on top but stays soft underneath, which causes wrinkling and peeling.
Common mistakes and fixes
- Wrinkled gel: layer too thick or not cured long enough. Use thinner coats.
- Peeling after 2–3 days: oils on the nail or gel touching the cuticle. Clean better and leave a tiny gap at the cuticle.
- Still sticky after curing: normal for many top coats (the inhibition layer). Wipe with alcohol.
- Thumb not curing: cure thumbs separately, flat under the lights.
Nail art ideas for beginners
Once the basics work, try nail art stencil stickers for clean lines and shapes, or crackle polish for a textured look. For press-on nails without glue, jelly tape (120 double-sided tabs) lets you swap nails without damage.
How to remove gel safely
- File off the shiny top coat.
- Soak cotton pads in acetone, place on the nails and wrap in foil for 10–15 minutes.
- Gently push off the softened gel with a cuticle pusher. Don’t peel or scrape hard.
- Buff lightly and apply cuticle oil.
Frequently asked questions
How long should I cure gel polish under an LED lamp?
Typically 30–60 seconds per layer for LED and longer for UV-only lamps. Follow the instructions of your gel brand, because cure times differ.
Can I use regular nail polish with a UV LED lamp?
No. Regular polish air-dries. The lamp only cures gel products.
How long do home gel nails last?
With good prep, usually around two weeks. Poor prep is the main reason they peel earlier.
Is a 36W lamp enough for home use?
Yes, for most soak-off gels. Choose 54W or 72W if you want faster curing or use thick builder gels.
Are UV nail lamps safe?
Exposure per session is short. If you’re concerned, apply sunscreen to your hands or use fingerless UV-protective gloves.
See all lamps, gels and tools in Nail Care & Nail Art.